How to BBQ right: 22 tips for professional results every time
Master how to bbq right with professional advice and guidance on choosing the right barbecue fuel, optimum cooking temperatures, and more
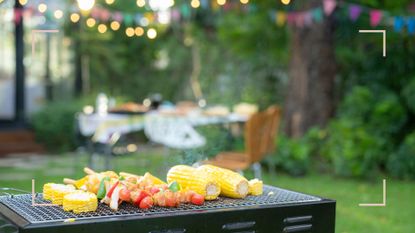

Master how to BBQ right with our expert tips and guidance from professional chefs and barbecue specialists to make your outdoor cooking experience all the more enjoyable (and successful) this summer.
Conquering the art of outdoor cooking is key to hosting sociable summer dinners and garden parties in style. But it's often a misconception, given the relative simplicity of a BBQ compared to some ovens, that cooking on a BBQ is an easy option. The fact is that many of us don't know how to BBQ right to get the same results time after time.
Our expert guide provides professional advice and tips to help you get the desired result from your BBQ every time. From how to light a BBQ for the best results, to masterful makeshift outdoor kitchen ideas and tips for ensuring everything is cooked thoroughly, bookmark this page to improve your outdoor grill game this summer.
How to BBQ right according to grill and food professionals
From how to get the coals to the right temperature to ensure everything is cooked to perfection to savvy chef cheats for finding hotspots, these top tips from grill and food professionals are not to be missed...
1. Make sure your BBQ is hot enough before cooking
This may seem an obvious tip, but not heating a BBQ to the correct temperature before you begin cooking is often the cause of many outdoor cooking errors.
"BBQs generally fall into one of two camps – charcoal and gas," explains Jess Meyer, group food editor at woman&home. "While a gas BBQ can generally be utilized in much the same way as an indoor grill or griddle pan, a charcoal BBQ requires a little more love and care. Both have their strengths and charms, so the choice is entirely up to your personal preference."
"For fans of gas barbecues, the ease of prep is a big selling point. Fire up a gas barbie and you’re ready to cook. Much like cooking on a cast iron skillet, griddle, or frying pan, the main point to remember here is to heat the grill adequately before adding the food," Jess explains.
Sign up for the woman&home newsletter
Sign up to our free daily email for the latest royal and entertainment news, interesting opinion, expert advice on styling and beauty trends, and no-nonsense guides to the health and wellness questions you want answered.
"Most gas barbecues come with a lid and internal thermometer so you can keep an eye on the temp, but generally you’ll know it’s ready when the grill plate is slightly smoking and you get that satisfying sizzle when the food hits the grill."
2. Use safe measures to light
If you have a charcoal BBQ, don't be tempted to get the fire alight with anything other than proper BBQ firelighters.
"Always buy firelighters that are suitable for cooking - you don’t want any nasty chemicals around your food," advises Jess. "A BBQ chimney starter is a worthy investment if you’re working with charcoal as this will both speed up the lighting and make arranging the coals in the BBQ easier."
"If using logs, arrange them directly in the base of your BBQ in a Jenga shape around the firelighter," suggests Jess. "Once the wood has burnt down to red-hot embers, you can maneuver these around the base using a long-handled poker or shovel, banking to one side for indirect heat, or spreading them out for direct heat cooking."
3. Zone your coals and work the whole grill
Create an optimum cooking surface on a charcoal grill by zoning your BBQ.
This is the same concept as when cooking in the oven, where you choose different heat for different dishes. "Most BBQ cookery requires two temperature zones," explains Jess. "Direct grilling is where the food is cooked directly over the heat source, whereas for indirect grilling the coals are banked to one side, and the food is cooked over the other section, where it's a little cooler."
"In general, you’ll use the indirect setup for cooking food through - whether this is meat, fish, or veggies. It’s also useful for low and slow-style cooking and hot smoking. Direct heat grilling on the other hand is good for smaller items like kebabs, or for giving a final surface char to almost cooked cuts - steaks or chicken thighs for example."
"Steaks will need a higher heat and frequent turning while sausages benefit from a more moderate heat and less frequent turning," says Catharine. Advising how to achieve different temperatures on a BBQ Catharine explains, "Use the edges of your grill to control the heat if things are cooking too quickly."
4. Utilise your BBQ’s hotspot
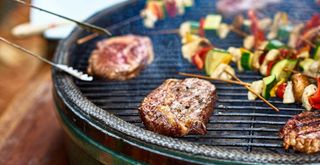
The art of cooking on a bbq, whether coals or gas, is all about finding the right spot for maximum heat effectiveness.
“It’s best to preheat the grill to around 205-230°C. This allows for a good sear and delicious caramelization on the outside while still allowing the inside to cook to your ideal level," explains Peter Sidwell, an in-house professional chef at CookServeEnjoy.
"I recommend making use of your grill’s hotspot, or the parts which are hotter than others. I always make sure my BBQ has a hot spot in the center of the grill at around 200°C for searing and then spots around it at 150°C so that I can move food over to a cooler area to cook slowly."
5. Do the bread test
Professional chef Peter has a bread testing method he uses to located hot spots across the grill."If you have stale bread in the back of your cupboard, here’s a great way to use it to find your grill’s hotspots."
"Preheat the grill on high for 15 minutes, and then turn the heat down to medium," he advises. "Place a single layer of your stale sliced bread across the entire surface of your grill. Close the lid and cook the sliced bread for 60 seconds before turning off the grill."
"Flip over each piece of bread, keeping the slices in the same place," Peter explains. "Where you see overdone toast is where you have your hot spots."
6. Add flavored wood chips
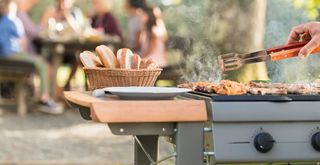
Choose the right cooking materials to maximize flavor. "Go for charcoal for full-bodied smoky flavor. If you want to take the flavor to the next level, add some wood chips," says Catharine Edwards, Culinary Manager at Garden Gourmet.
"There are loads of flavor options, from beechwood, hickory, apple, cherry, and mesquite. They also made a great present for any budding BBQ masters. You can soak the chips in water to prevent them from burning up too quickly, or my top tip is to create a foil parcel (use strong or double-layer foil) for them, leaving only a small hole open in the top for the smoke to come out.
7. Set up a BBQ work station
Apply the same rules for your outdoor kitchen as you do when planning how to organize a kitchen by having everything essential to hand.
"The first thing you need to do is set up a station with all the tools you will need throughout the day, such as tongs, brushes, marinades, spatulas, and plates with foil to cover food that is ready," says Lizzie. This means you won’t need to run back into the kitchen or wait for someone to bring you it and risk overcooking or burning any food."
"It will make the whole process of BBQing a lot calmer, organized, and enjoyable. It’s also advisable to have two sets of utensils at your station: one for raw meat, and one for cooking. This will stop you from having to run to the sink to do lots of washing up.’’

8. Wait for the coals to ashen
They say patience is a virtue and that's certainly true when it comes to getting BBQ coal to the optimum temperature.
"There’s nothing worse than taking some quality ingredients and reducing them to an unidentifiable charred lump. It’s essential to wait until the charcoals are ashy and any flames have died down," warns Catharine.
"‘Flamegrilled is misleading as only ashen coals will give the right heat level to cook your food to perfection. If you don’t have a chimney, create a sort of pyramid with coals, leaving a few gaps for air. Put the fire lighting material in between the gaps, and let them get hot before spreading the coals out over the base of the barbecue."
9. Cook directly on the coals
Utilize the smoldering ash to gain bonus cooking time. "Another advantage of cooking with coals is the opportunity of cooking directly in the embers," suggests Jess.
"Wrap hardy root veg in foil and cook them directly in the embers for a fantastically charred exterior and tender interior, or toss whole aubergines directly in the coals for the beginnings of a delightfully smoky baba ganoush."
10. Always use a meat thermometer
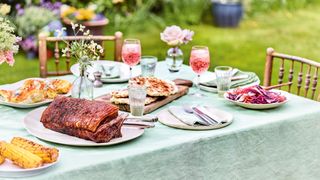
"When cooking chicken or steak on the barbecue I'd always recommend using a meat thermometer,” advises Jessica Ransom, former senior food writer at woman&home. “It ensures peace of mind and will help you to not under or overcook it.”
“I prefer a digital meat thermometer as it's easier to read and provides a quick reading. When cooking chicken it's important to put the probe in the thickest part of the meat but don't touch the bone. It should read 74C and juices will run clear."
"For steak, if you'd like it rare the probe should read 48-52C, 53-57C for medium-rare, 58-62C for medium, and 68-72C for well done. It's important to rest your meat after cooking as it will become more tender as it relaxes. Keep in mind that it will continue to cook a little as it rests so for best results remove the meat from the barbecue when it's a degree below your target temp."
11. Start cooking indoors and finish on the grill
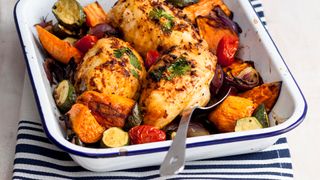
Far from being a 'cop out', starting to cook meats like chicken in the oven before moving them onto the BBQ can help you BBQ like a pro consistently whilst avoiding the food wastage that comes with meat that looks undercooked.
"If you’re new to barbecuing or only have a small grill, you can part-cook items before finishing them on the barbecue, to give you more control," suggests Catharine. "It’s more washing-up but it can take the stress out!"
12. Cook burgers at room temperature
Get the best results when cooking by taking your homemade burgers out of the fridge in plenty of time. "Take your burger out of the fridge and bring it up to room temperature before cooking," advises Luke Taylor, head of food at Hub Box.
"It’s always best to BBQ burgers over wood if possible to maximize taste. Season the burger, then stick it straight on the BBQ and cook on high heat to seal in the flavor. Season again after searing - smoked salt is great for this to bring out the flavor in the meat."
13. Use a saucepan for the perfect burger
There are many different types of pan you can cook a burger in when cooking inside on a hob, but Luke from Hub Box isn't suggesting that you try and use your best induction pan on the outside grill - at least, not in a traditional sense:
"To achieve a professional result, everyone should use a cloche when cooking or a saucepan will do," says Luke.
He explains, "While the burger is on the BBQ, melt the cheese on top, add the top burger bun, sprinkle with a few drops of water, and cover with a cloche or saucepan. This creates steam which softens the bun and melts everything together."
If things don't go to plan, see our guide on how to clean a burnt pan easily to help clear up any resulting mess.
14. Don't apply pressure to the meat
We've all seen this method in action to make the meat sizzle but it turns out that the sizzling sound is the flavor escaping.
"Resist the temptation to press your meat into the grill to make it nice and compact. Pressing your meat on the grill will only deprive it of most of its flavor and the marinade you’ve spent time preparing it in," warns Lizzie.
"Instead, let it cook all the way through and flip once to cook on each side. This technique will create clear and defined grill marks that make you look like a BBQ master.’’
15. Reach for kitchen towel to stop food sticking
Food sticking to the grill dues to the initial intense heat is a common problem when cooking on a BBQ.
“Wet food is more likely to stick to the grill, so make sure your ingredients are dry before barbecuing by using a kitchen towel," suggests Peter. "Then, use a high-heat cooking oil to coat your food, as this will create a protective barrier from the grates.”
16. Put a lid on it
Make the most of a lid to keep the heat in and intensify the flavor as you cook. "As a general rule, barbecuing with the lid down recreates the steady, more even heat of a conventional oven," explains Jess. "Cook larger joints of meat or sturdy veg like pumpkin in this manor – anything where you essentially want to roast/bake."
"Remember to keep the coals well stocked for a consistent temperature, and it’s useful to have a thermometer for this type of cooking so you can keep an eye on the internal temperature of meat or poultry without having to open the lid."
"This will also help seal in all the smoky flavor, melt any cheese over your burgers and retain heat (when it’s windy!) and moisture, for a succulent, juicy result," says Catharine. "Just make sure you don’t close the vents in the lid or you may snuff out your coals!"
17. Let meats rest before serving
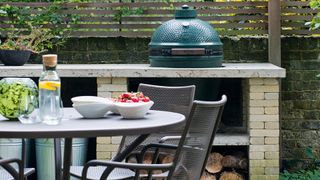
The crucial part when cooking meats on a BBQ, after not burning them of course, is to let them rest to keep barbecued meat juicy and succulent.
"Letting your meat or fish rest for at least 10 minutes after barbecuing will allow the juices inside to redistribute evenly," Peter explains. "As juices move towards the centre while cooking, cutting the meat immediately after you've taken it off the BBQ could cause the juices to come flowing out onto your chopping board, and you'll be left with a dry piece of meat that is lacking in flavour.”
18. Be adventurous with veg
Embrace the smokiness of BBQ cooking to enhance vegetables rather than just meats. "Zucchini is fantastic cooked on the BBQ,” says Rose Fooks, deputy food Editor at woman&home. “The charring intensifies the flavor and the moisture content means they don't dry out with the intense heat."
"The quickest and easiest way to cook zucchini on the BBQ is as kebabs. Simply chop the zucchini into 1-2cm thick rounds, toss in oil and seasoning before threading onto skewers and BBQing until tender and charred."
A good tip if using wooden skewers is to soak them in water for at least an hour before putting them on the bbq, this will help stop the skewers from catching fire. The other alternative is to use metal skewers, which can be reused time and again.
19. Shift the focus to side dishes
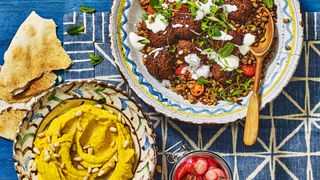
Rather than placing the emphasis on one main dish or centerpiece, Alex Head, Founder of Social Pantry, advises shifting the focus of your meal to many smaller side dishes for a professional-level spread. A great lunch idea for entertaining friends, Alex explained to woman&home how this BBQ tip can take some of the pressure off the host and put guests at ease:
"Not only are they delicious and often people’s favorite part of a meal, having lots of vibrant, colorful dishes on the table conveys that sense of generous abundance that makes people feel relaxed about tucking in. And, by offering a range of choices, there is bound to be something for everyone!"
20. Make a plan for leftovers
No one likes to see food go to waste and there always seems to be vast surplus food after a BBQ, no matter how carefully you budget per head. Alex has a great tip to save leftovers ending up in the food bin, suggesting, "Let guests know in advance that there might be leftovers and encourage them to bring a Tupperware to take food home."
"You can also purchase and provide recyclable or compostable takeaway packaging to avoid excess single use foil or cling film. Think about what dishes keep well and plan your weekly menu with leftovers in mind."
Check out our expert guide on how long cooked chicken lasts in the fridge to help plan when to use your leftovers.
21. Clean your BBQ straight after use for the best results every time
When it comes to how to clean a BBQ, Catherine offers this top tip, "When you’ve finished with the barbecue, the best way to clean it is when it’s still warm but not so hot it’s going to burn you. I know it’s really tempting to leave it until the following day, but I promise you, that it will take half the time and effort if you attack it sooner!"
Keeping your grill clean will ensure your BBQ stays in optimum condition to deliver you the best possible results every time you use it.
22. Oil the grate to prevent rust
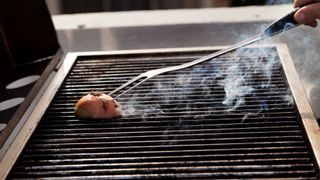
After after care step recommended by top chefs is to oil the BBQ grill after cleaning. "Along with cleaning after use, oiling your BBQ is essential," says Peter. "Not doing so will mean you’ll probably have a rusty grill very soon."
"Oil helps to repel water and moisture, which contribute to the formation of rust. Vegetable oil works well as it has a high smoke point, meaning it doesn't burn easily."
Simply put a small amount of oil onto a piece of kitchen towel and use that to apply a light coating of oil to the BBQ grill to ensure it stays in tip top condition for its next use.
Which fuel is best for a BBQ?
It's ultimately a personal preference but our experts offer advice to help you decide on the best fuel for your BBQ. "You can use wood or charcoal to fuel flames," explains Jess. "Either way, choose from a sustainable source. Charcoal often comes from tropical trees, but there are some fantastic UK-based suppliers offering sustainably and ethically sourced charcoal and wood. Make sure any kindling and logs are kiln-dried and suitable for cookery to ensure there’s no additional smoke or unwanted tree resin - both of which will impart a bitter flavour."
"For the BBQ beginner, charcoal tends to be easier to handle and is a speedier process as the briquettes/lump wood simply needs to heat up," explains Jess. "The smaller pieces are also easier to manoeuvre around the grill for controlling direct and indirect heat (more on that below)."
"Wood on the other hand is lauded by grilling pros for its superior flavour, easily customisable depending on the type of wood you choose. If going down the wood route, choose ingredients that benefit from longer slow cooking methods, and pair well with a smoky flavour, which is more prominent with wood."

Tamara is a highly experienced homes and interiors journalist, with a career spanning 22 years. Now the Lifestyle Editor of womanandhome.com, she previously spent 17 years working with the style teams at Country Homes & Interiors and Ideal Home, and it’s with these award-winning interiors teams that she gained a wealth of knowledge and honed her skills and passion for styling and writing about every aspect of lifestyle and interiors.
A true homes and interiors expert, Tamara has served as an ambassador for leading interior brands on multiple occasions, including appearing on Matalan’s The Show and presenting at top interior trend forecasting events such as the Autumn Fair and Spring Fair.
-
 After years of bleach and heat styling, my hair snapped off – here’s everything I’m doing to bring it back to life
A beauty editor shares every step she's taken to heal her damaged hair
By Rebecca Fearn Published
-
 The ocean's most unique and colourful sea creatures, from ethereal jellyfish to vibrant and curious lionfish
The underwater world is pure magic
By Lydia Swinscoe Published