How to clean a shower head to descale and improve water pressure
Our easy guide explains how to clean a shower head using vinegar and baking soda to remove limescale effectively


Amy Hunt
Knowing how to clean a shower head is essential if you want to keep every element of your bathroom sparkling, but this crucial component often gets forgotten during the cleaning process.
It's understandable when tending to your bathroom clean on a weekly basis – a timeline recommended by experts as to how often you should clean your bathroom – you won't always have the time to deep-clean the shower head. And while it may not be as dirty as the floor of your shower, it's not exactly clean and may be hiding mildew and bacteria.
Also consider that the water passing through the shower head every day leaves behind mineral deposits which, over time, can cause a limescale build-up that can clog the holes and reduce the water pressure. To avoid downgrading your shower experience, it's important to make time to clean the shower head if you really want to clean a shower thoroughly.
While you'll need to do more than a quick wipe down, fortunately, it's easy to learn how to clean a shower head with ease.
How to clean a shower head in 5 easy steps
Cleaning a shower head is surprisingly simple. You probably have everything in your house already, including vinegar and freezer bags. Cleaning with vinegar is a much-loved cleaning hack for tackling bathroom cleaning and kitchen cleaning routines, thanks to its effectiveness and degree of antibacterial qualities.
“Vinegar is an excellent cleaner, as its acidic properties are effective at breaking down general dirt and scum," explains Dave Rudge, Operations Manager at REACT Specialist Cleaning.
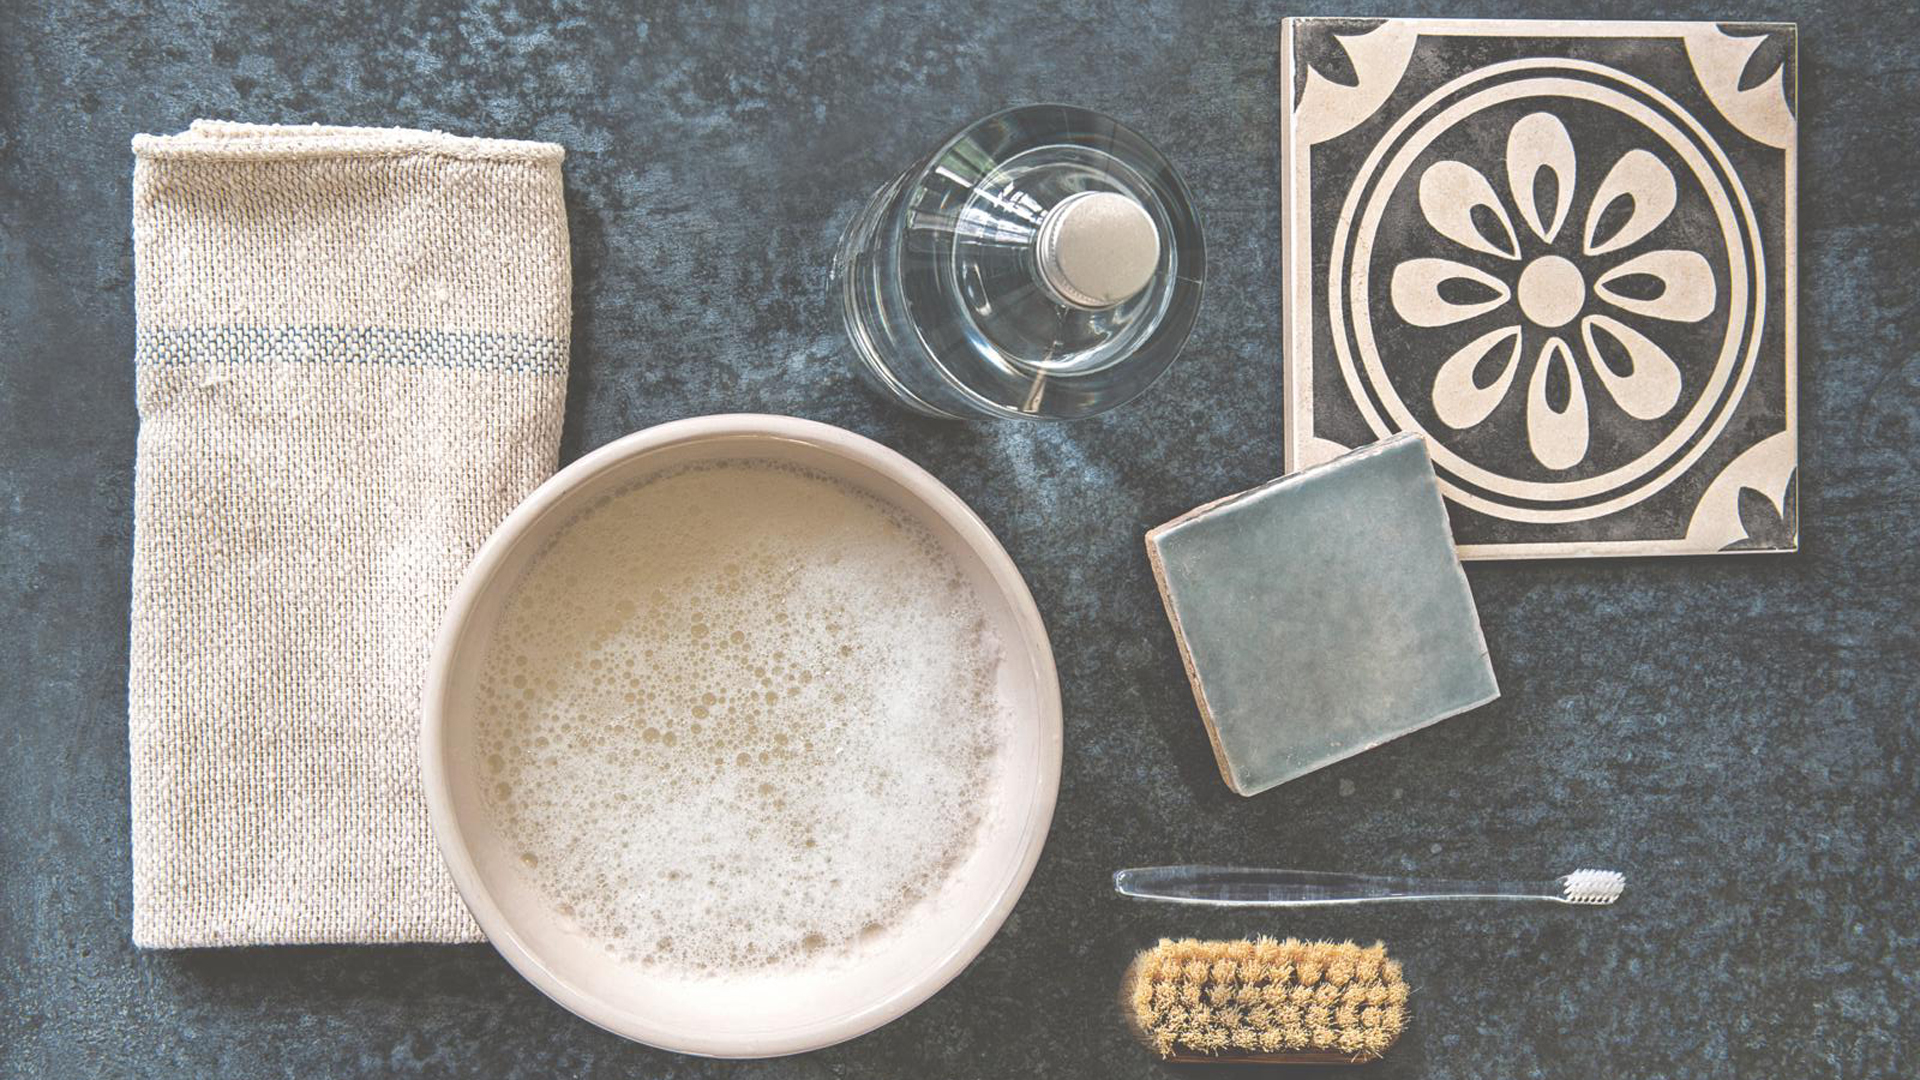
Here are the steps you need to take and the materials you'll need:
Sign up for the woman&home newsletter
Sign up to our free daily email for the latest royal and entertainment news, interesting opinion, expert advice on styling and beauty trends, and no-nonsense guides to the health and wellness questions you want answered.
- White vinegar
- Soft-bristled sponge
- Microfibre cloth
- Optional: Freezer bag and twist tie, rubber band, or strong twine.
- Optional: Baking soda
1. Remove your shower head
The first step is to prepare the shower head - this is best done by removing it. "Most shower heads come off with either screws or pressure applied to the joins where the shower heads have been manufactured," advises Ivan Ivanov of End of Tenancy Cleaning London.
"You may find your shower has a rubber hose attachment underneath, please be sure to keep that in a safe place temporarily as otherwise, your shower head will leak."
Don't have a removable shower head? Fear not. Take a simple freezer bag and advance to the second step.
2. Prepare your cleaning solution
Next, it's time to prepare your cleaning product, for which vinegar is the most popular choice – as is the case for how to clean a fridge, how to clean a microwave, and when descaling a kettle because it's natural yet highly effective.
"White vinegar attacks the limescale, corroding it off hard-to-reach surfaces and leaving your shower head looking sparkling clean," explains Ivan.
It couldn't be easier to make your own natural remedy: simply mix equal parts of white vinegar with water to create an acidic yet natural cleaning solution.

3. Submerge the shower head
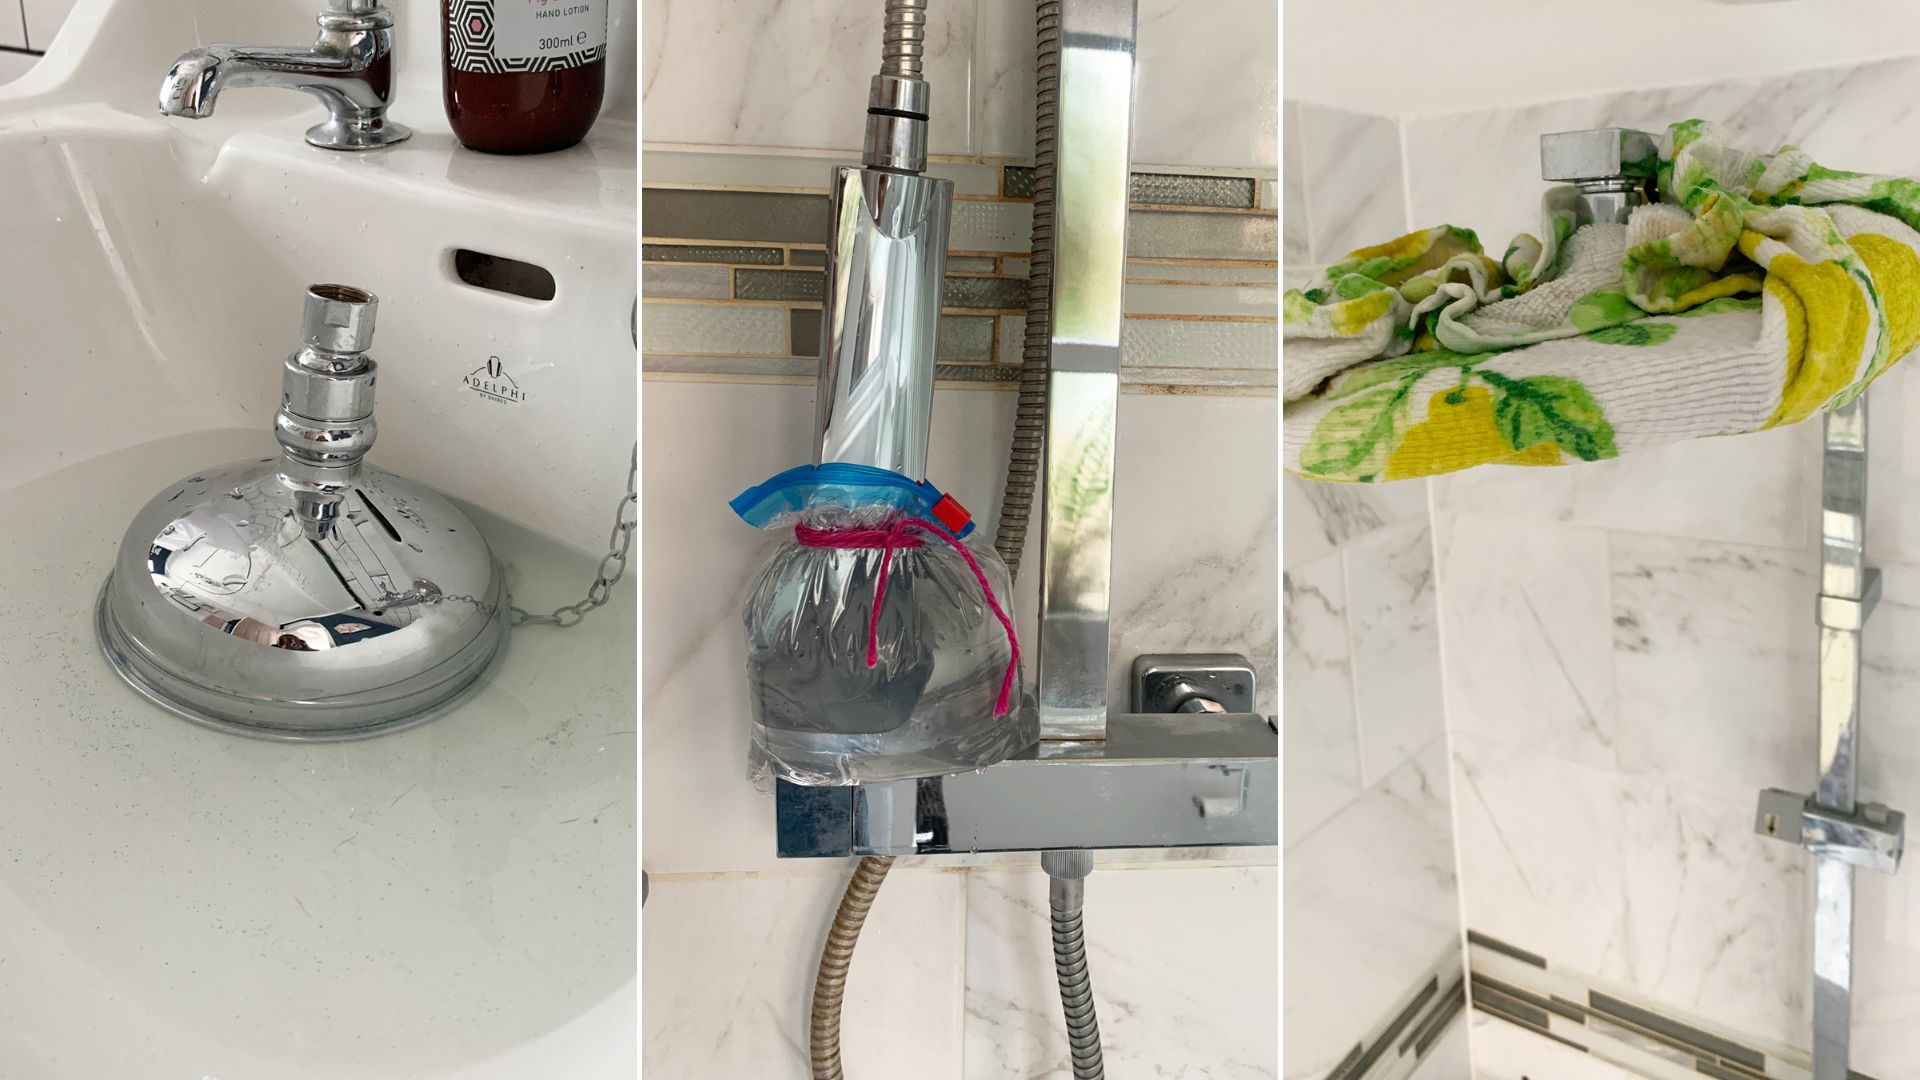
The next step is to submerge the shower head in the diluted vinegar solution. If you have a removable shower head it can be placed face down directly into the sink filled with the solution – ensuring there's enough to submerge the whole surface area of the head.
If your shower head is fixed to the wall or a bath tap mount, you will need to submerge it in the solution by tying a freezer around the head, again ensuring it's fully covered by the solution. A sandwich bag is not strong enough to withhold the weight of the solution, so it's essential to use a freezer bag when using this method. Secure the bag in place with a twist tie, rubber band, or strong twine. We recommend, if possible, dropping the shower head down so you can rest the bag on a surface to reduce the weight and avoid it hanging because it does feel heavy.
If your fixed shower head is too big to cover with a freezer bag, follow a top tip shared by Lynsey Crombie, cleaning expert, TV star, and Queen of Clean: "If the head doesn’t come off or fit in a freezer bag, drench a tea towel in white vinegar and wrap around the head." Ensure the vinegar-soaked cloth is pulled tight so it's in contact with the shower head surface.
In all cases, make sure the holes are submerged to ensure the vinegar is targeting every area of caked-on limescale.

4. Let it sit for 20-30 minutes
Hang back and let the vinegar mixture do its thing! "After between 20 to 30 minutes, remove the shower head and rinse under cold running water," advises Ivan. "This should blow away any leftover limescale, leaving the head looking cleaner."
The recommended time is 30 minutes, but it may be that your shower head is especially dirty or clogged, and in some cases, you can even let it sit overnight but it's essential to check your shower head material is suitable to be left in the solution for longer periods.
"The acidic properties which make vinegar so effective as a cleaner can also damage the surfaces being cleaned,” warns Dave. So if you have a shower head that's stainless steel, coated with brass, nickel, or another fine finish, keep in mind that prolonged exposure to vinegar can damage the finish. It's a good idea to consult the user manual for instructions if you have a shower head that requires special care and attention.
5. Rinse and wipe clean
Depending on which method you've opted for, now is the time to either pull the plug or open the bag, pouring the solution down the drain. Once the vinegar solution has drained, it's time to run cold water through the shower head to flush out any buildup.
If at this stage you notice any stuck-on residue, you can use a soft bristle toothbrush or non-abrasive sponge to scrub it away gently to avoid scratching the surface. "Only if required, take the bristled side of a sponge and rub firmly against the nubs on the face of the shower head," advises Ivan. "Sometimes, limescale can sit deep inside those nubs, causing the irregular water angle that you find on showers affected by limescale."
There's also the option to wipe it dry at this stage with a clean microfiber cloth, and you're good to go.

Can baking soda clean a shower head?
For an extra tough limescale build-up, you can also use baking soda to clean a shower head effectively, as it creates a chemical reaction with the vinegar which will accelerate and amplify the cleaning process.
Simply pour half a cup of baking soda into your sink or plastic bag and slowly add vinegar until either is approximately half full – taking your time to let the bubbles settle as you go so you don't have an overflow situation.
You can add a little water to dilute the solution to ensure the shower head is fully immersed in the liquid. Leave for no longer than half an hour and rinse thoroughly in warm water to ensure all traces of the vinegar have been removed.
How to clean a shower head without vinegar
While using vinegar is a much-favored method for cleaning a shower head you may be looking to avoid it altogether if your bathroom material is likely to be affected by the acidity levels of a vinegar solution. "A quick and easy alternative to white vinegar is to use just a mixture of baking soda and water," says Ivan.
"Mix a third of a cup of baking soda with two-thirds of a cup of water until a paste forms. Use that paste on your shower head. After 15-20 minutes, follow steps 3 and 4 from above to get a sparkling result!”
You can also use a dedicated descaling bathroom commercial cleaner, just ensure you choose one that doesn't contain harsh chemicals – and always rinse thoroughly after cleaning to remove all residue.
Dave adds, “And although vinegar does have some disinfectant properties, it is not fully effective as a disinfectant as it will only kill certain types of pathogens such as Salmonella and Listeria – so should not be used as the only disinfectant in a given area." You might choose a more dedicated disinfectant to tackle the job, which you can find at your local store in the cleaning aisle.
This baking soda-and-water solution can also be used to clean oven trays or to clean a BBQ.

What is the brown gunk on my shower head?
Most instances of brown 'gunk' on your shower head are a result of hard water causing limescale to build up. “Limescale is the result of calcium and magnesium being left behind when hard water evaporates, causing a chalky, scummy residue to build up in your shower heads," explains Tony Jones, General Manager at Harvey Water Softeners. "Limescale can take on a host of colors depending on the different compounds that can be found in the water coming into your home."
While most build-ups usually take an off-white or grey color. they can appear brown due to iron levels and sediment deposits found in the water supply "Coloration is further influenced by the fact that, as limescale dries, it picks up any dirt or trace particles along with it and slowly stains build layer by layer."
Is it better to clean a shower head with bleach or vinegar?
It is better to clean a shower with vinegar because it is a safer option to that of cleaning with bleach. While you should thoroughly rinse the shower head through after any cleaning solution is applied it is best to try to avoid any harmful chemicals altogether.
Also bleach is not all that effectively for actually removing limescale, the most common problem when faced with cleaning a shower head. Bleach removes the discoloration but may not remove the entire build-up of limescale, so it's better to clean with vinegar over using bleach.
How often should I clean my shower head?
Lynsey recommends cleaning your shower head, "every other month or when you notice the water not coming out efficiently." That's not to say if you have hard water, or if there are multiple people using the shower every day, you may need to do it more often. But because cleaning your shower head is safe and easy, it's perfectly fine to do this as often as you need to.
Lynsey points out a good rule of thumb is to clean it any time you notice the water isn't flowing smoothly through the holes and therefore compromising the water pressure from your shower head.
You can also keep a spray bottle of homemade cleaner in your shower and give your shower head a spritz about once a week. This will help you maintain that fresh feeling in your shower and lengthen the time in between deep cleans.
How to keep your shower sparkling between deep cleans
- Wipe the shower screen after each use: An easy way to keep your shower looking fresh is to wipe down the shower screen after each use to reduce watermarks. Use a squeegee for best results or simply wipe away excess water with a microfibre cloth.
- Spray weekly with vinegar solution: As mentioned above, you can spray your shower head once a week with homemade vinegar and water solution. Make that a part of your shower-cleaning routine when you scrub the walls and floors, and you won't have to do the complete deep-cleaning process as often.
- Wash your shower curtain: If you have a shower curtain, cleaning it is also an important part of maintaining a spotless shower. When left alone, mildew and soap scum will slowly take over. Fortunately, you don't have to struggle with scrubbing it clean. If it's looking grungy, simply pop it in the washing machine when you're washing your towels. Do this about once a month to prevent buildup and keep the curtain looking fresh.

Tamara is a highly experienced homes and interiors journalist with a career spanning over 22 years. Now the Lifestyle Editor of womanandhome.com, she previously spent 18 years working with the style teams at Country Homes & Interiors and Ideal Home. With these award-winning interior teams, she gained a wealth of knowledge and honed her skills and passion for styling and writing about every aspect of lifestyle and interiors.
A true homes and interiors expert, Tamara has been an ambassador for leading interior brands on multiple occasions, including appearing on Matalan’s The Show and presenting at top interior trend forecasting events such as the Autumn Fair and Spring Fair.